蝙蝠岛资源网 Design By www.hbtsch.com
原图

最终效果

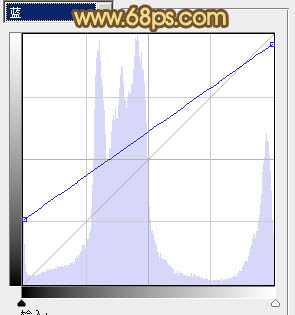
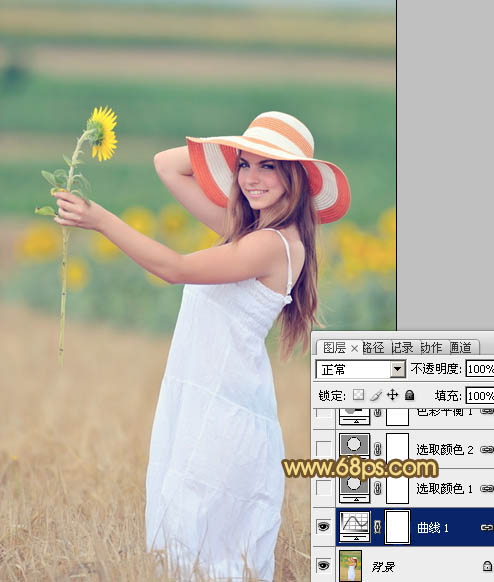
1、打开原图素材,创建曲线调整图层,对蓝色进行调整,参数设置如图1,效果如图2。这一步增加暗部的蓝色。
<图1>
<图2>
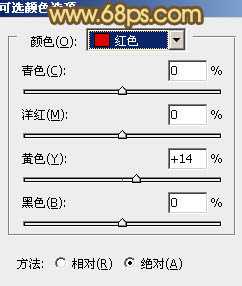
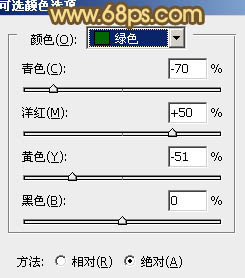
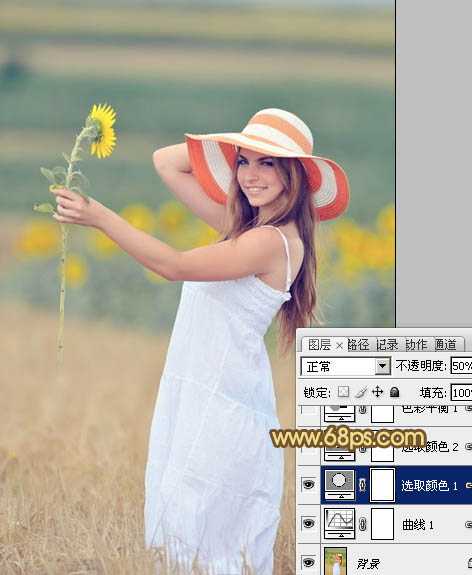
2、创建可选颜色调整图层,对红,绿进行调整,参数设置如图3,4,确定后把图层不透明度改为:50%,效果如图。这一步增加图片的红色和青色。
<图3>
<图4>
<图5>
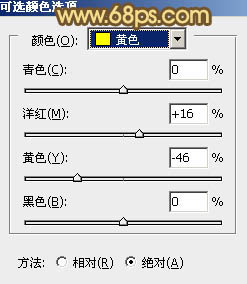
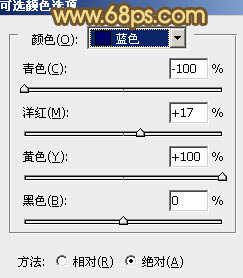
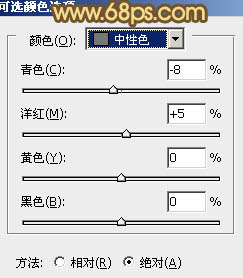
3、创建可选颜色调整图层,对黄、青、蓝、白、中性、黑进行调整,参数设置如图6 - 11,确定后把图层不透明度改为:80%,效果如图12。这一步增加图片的紫红色并把整体颜色调柔和。
<图6>

<图7>
<图8>

<图9>
<图10>

<图11>
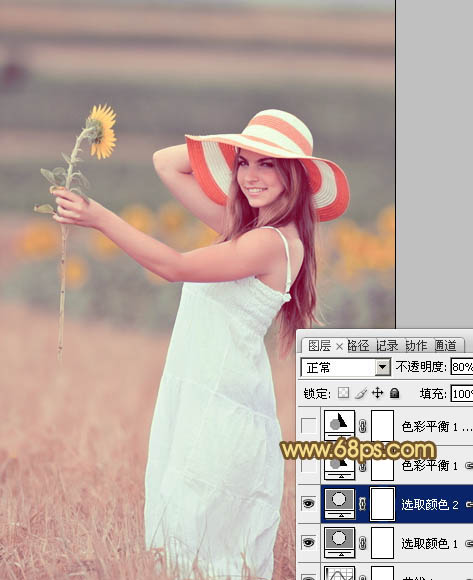
<图12>
4、创建色彩平衡调整图层,对阴影、中间调、高光进行调整,参数设置如图13 - 15,效果如图16。这一步增加图片的橙黄色。
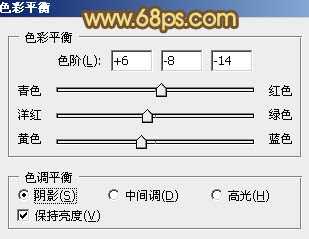
<图13>
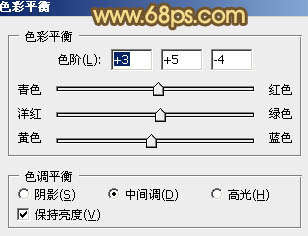
<图14>

<图15>
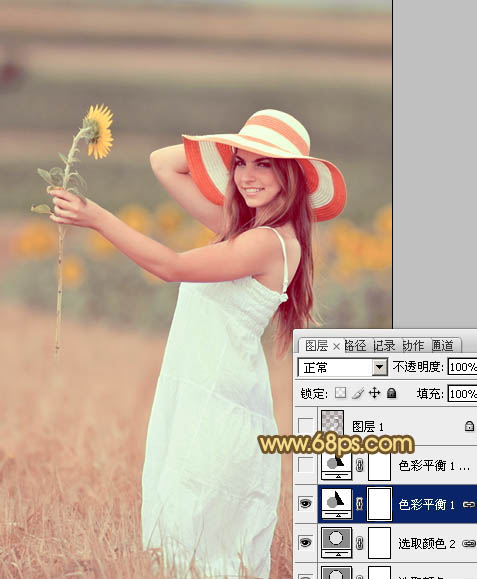
<图16>
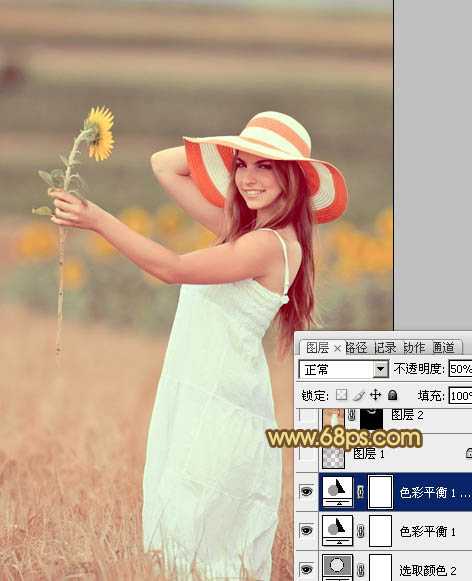
5、按Ctrl + J 把当前色彩平衡调整图层复制一层,不透明度改为:50%,加强背景部分颜色,效果如下图。
<图17>
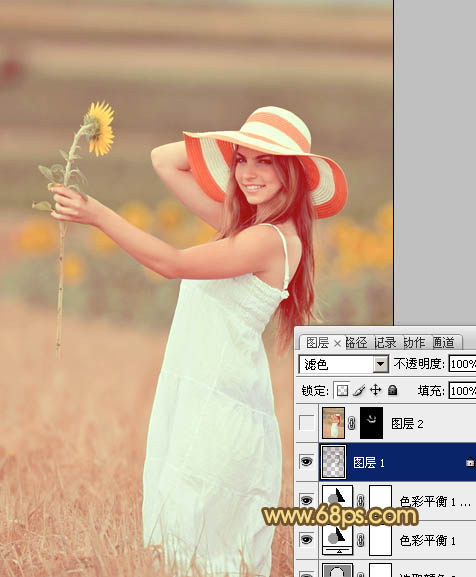
6、按Ctrl + Alt + 2 调出高光选区,按Ctrl + Shift + I 反选,新建一个图层填充暗红色:#551A05,混合模式改为“滤色”,效果如下图。这一步适当提亮暗部颜色。
<图18>
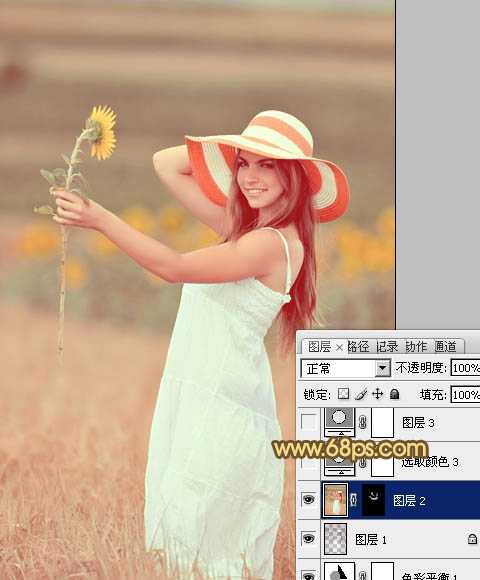
7、新建一个图层,按Ctrl + Alt + Shift + E 盖印图层。简单的给人物磨一下皮,消除肤色部分的一些瑕疵,方法任选,大致效果如下图。
<图19>
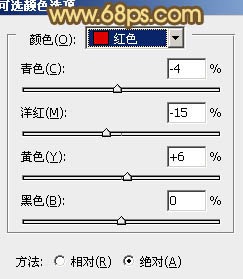
8、创建可选颜色调整图层,对红、黄、白进行微调,参数设置如图20 - 22,效果如图23。这一步增加图片的粉色,让人物看上去更甜美。
<图20>
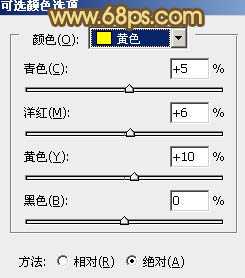
<图21>
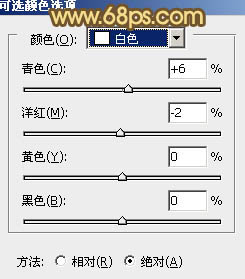
<图22>
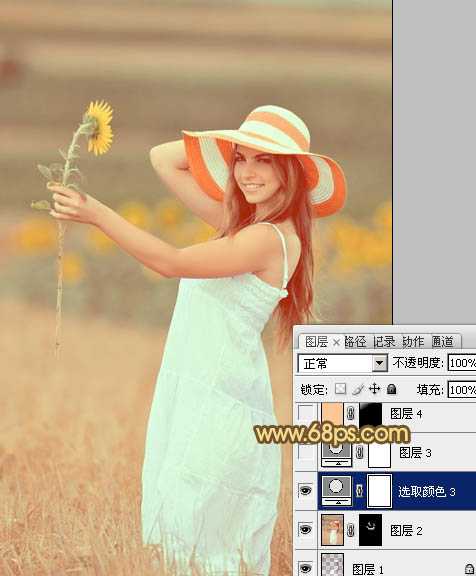
<图23>
9、按Ctrl + J 把当前可选颜色调整图层复制一层,不透明度改为:30%,效果如下图。
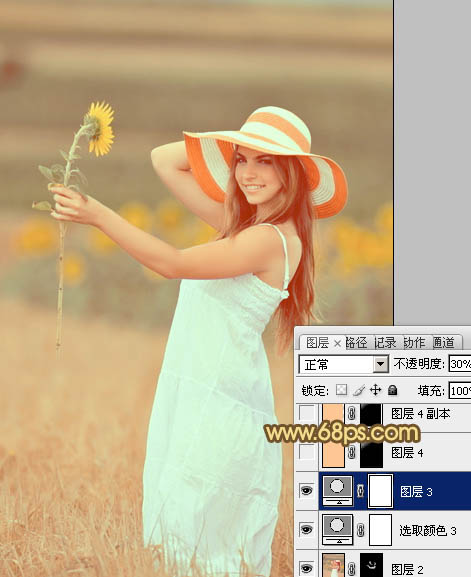
<图24>
10、新建一个图层,按照自己喜好的方法,给图片简单加上一些高光,大致效果如下图。
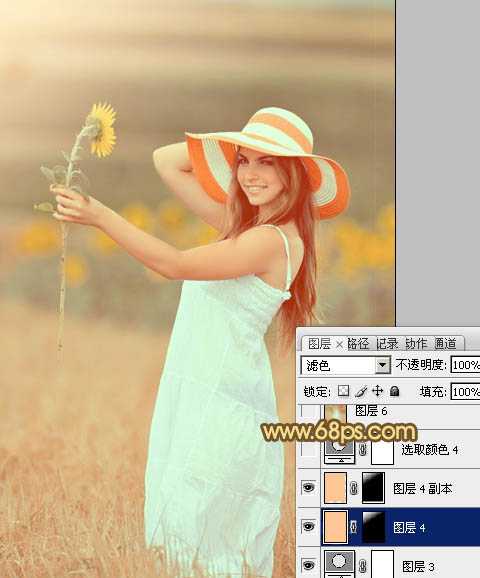
<图25>
11、创建可选颜色调整图层,对红、白进行调整,参数设置如图26,27,效果如图28。这一步增加图片淡红色。
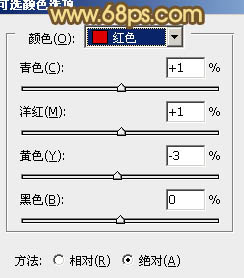
<图26>
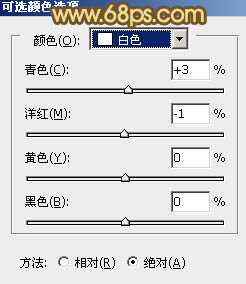
<图27>
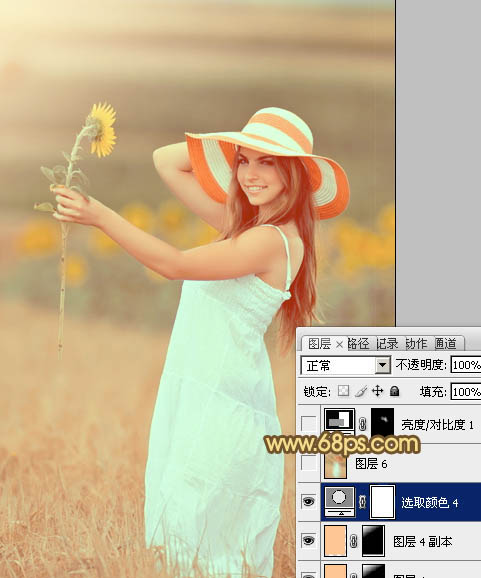
<图28>
12、新建一个图层,盖印图层,用透明度较低的加深工具,把人物头发部分加深一下,大致效果如下图。

<图29>
最后微调一下细节,完成最终效果。


最终效果

1、打开原图素材,创建曲线调整图层,对蓝色进行调整,参数设置如图1,效果如图2。这一步增加暗部的蓝色。

<图1>

<图2>
2、创建可选颜色调整图层,对红,绿进行调整,参数设置如图3,4,确定后把图层不透明度改为:50%,效果如图。这一步增加图片的红色和青色。

<图3>

<图4>

<图5>
3、创建可选颜色调整图层,对黄、青、蓝、白、中性、黑进行调整,参数设置如图6 - 11,确定后把图层不透明度改为:80%,效果如图12。这一步增加图片的紫红色并把整体颜色调柔和。

<图6>

<图7>

<图8>

<图9>

<图10>

<图11>

<图12>
4、创建色彩平衡调整图层,对阴影、中间调、高光进行调整,参数设置如图13 - 15,效果如图16。这一步增加图片的橙黄色。

<图13>

<图14>

<图15>

<图16>
5、按Ctrl + J 把当前色彩平衡调整图层复制一层,不透明度改为:50%,加强背景部分颜色,效果如下图。

<图17>
6、按Ctrl + Alt + 2 调出高光选区,按Ctrl + Shift + I 反选,新建一个图层填充暗红色:#551A05,混合模式改为“滤色”,效果如下图。这一步适当提亮暗部颜色。

<图18>
7、新建一个图层,按Ctrl + Alt + Shift + E 盖印图层。简单的给人物磨一下皮,消除肤色部分的一些瑕疵,方法任选,大致效果如下图。

<图19>
8、创建可选颜色调整图层,对红、黄、白进行微调,参数设置如图20 - 22,效果如图23。这一步增加图片的粉色,让人物看上去更甜美。

<图20>

<图21>

<图22>

<图23>
9、按Ctrl + J 把当前可选颜色调整图层复制一层,不透明度改为:30%,效果如下图。

<图24>
10、新建一个图层,按照自己喜好的方法,给图片简单加上一些高光,大致效果如下图。

<图25>
11、创建可选颜色调整图层,对红、白进行调整,参数设置如图26,27,效果如图28。这一步增加图片淡红色。

<图26>

<图27>

<图28>
12、新建一个图层,盖印图层,用透明度较低的加深工具,把人物头发部分加深一下,大致效果如下图。

<图29>
最后微调一下细节,完成最终效果。

标签:
人物图片,甜美色
蝙蝠岛资源网 Design By www.hbtsch.com
广告合作:本站广告合作请联系QQ:858582 申请时备注:广告合作(否则不回)
免责声明:本站文章均来自网站采集或用户投稿,网站不提供任何软件下载或自行开发的软件! 如有用户或公司发现本站内容信息存在侵权行为,请邮件告知! 858582#qq.com
免责声明:本站文章均来自网站采集或用户投稿,网站不提供任何软件下载或自行开发的软件! 如有用户或公司发现本站内容信息存在侵权行为,请邮件告知! 858582#qq.com
蝙蝠岛资源网 Design By www.hbtsch.com
暂无Photoshop将山坡上的写真人物图片增加上柔和甜美色的评论...
更新日志
2026年01月26日
2026年01月26日
- 小骆驼-《草原狼2(蓝光CD)》[原抓WAV+CUE]
- 群星《欢迎来到我身边 电影原声专辑》[320K/MP3][105.02MB]
- 群星《欢迎来到我身边 电影原声专辑》[FLAC/分轨][480.9MB]
- 雷婷《梦里蓝天HQⅡ》 2023头版限量编号低速原抓[WAV+CUE][463M]
- 群星《2024好听新歌42》AI调整音效【WAV分轨】
- 王思雨-《思念陪着鸿雁飞》WAV
- 王思雨《喜马拉雅HQ》头版限量编号[WAV+CUE]
- 李健《无时无刻》[WAV+CUE][590M]
- 陈奕迅《酝酿》[WAV分轨][502M]
- 卓依婷《化蝶》2CD[WAV+CUE][1.1G]
- 群星《吉他王(黑胶CD)》[WAV+CUE]
- 齐秦《穿乐(穿越)》[WAV+CUE]
- 发烧珍品《数位CD音响测试-动向效果(九)》【WAV+CUE】
- 邝美云《邝美云精装歌集》[DSF][1.6G]
- 吕方《爱一回伤一回》[WAV+CUE][454M]
