蝙蝠岛资源网 Design By www.hbtsch.com
效果图用到的素材比较少,在构图的时候就需要自己多花点心思,给每一个素材尽可能的美化及增加装饰元素。这样可以丰富画面并增加艺术感。
最终效果

1、新建一个尺寸是1200*720px白色背景的文件,用渐变工具(G)填充背景。

2、把模特图片拉进Photoshop里面,裁剪模特的上半身粘贴到我们新建的文件里,用橡皮擦工具(调整85%的硬度,为了是边缘不至于太僵硬甚至出现锯齿)擦掉模特下半身,如图。

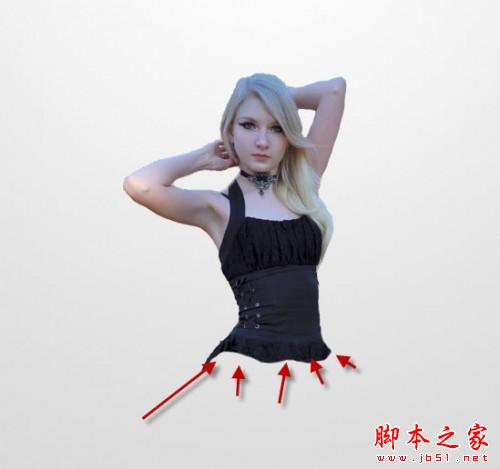
3、用70%硬度的橡皮擦调整边缘(目的是人物边缘变得柔和)。
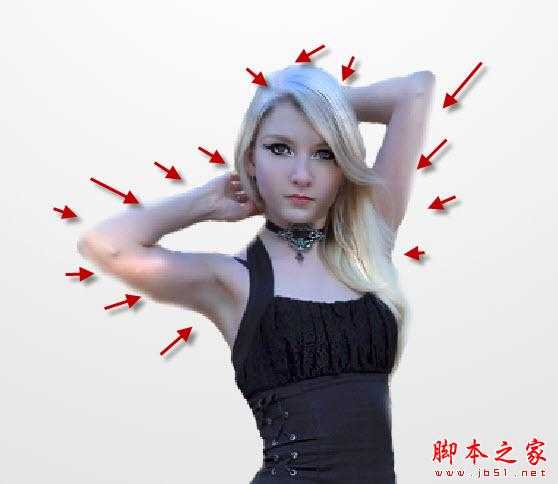
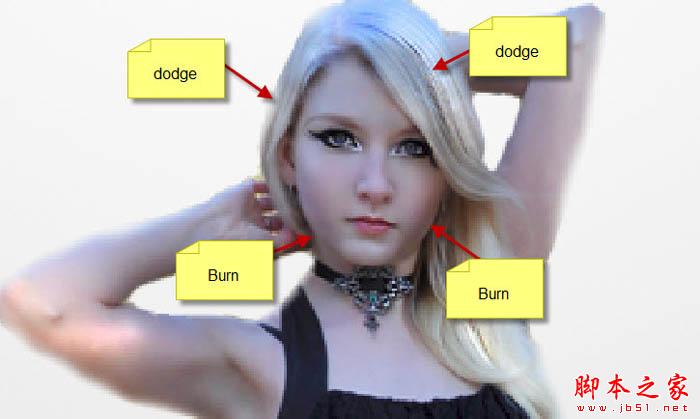
4、应用一些轻微减淡和加深效果用颜色减淡和加深工具(设置曝光度为10%)在模特上。
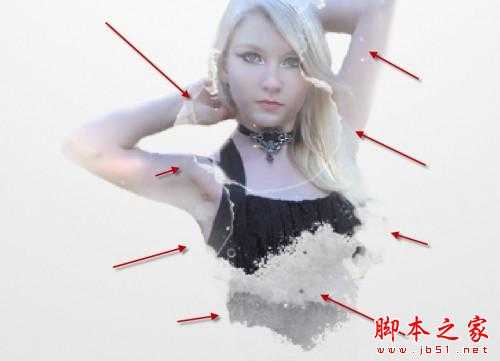
5、用裂痕笔刷作橡皮擦,擦掉模特某些部分,如图。在你用橡皮擦之前,调整为较小尺寸的笔刷。
6、添加下面的图像调整层并已模特为底层执行剪贴蒙版命令:黑白。

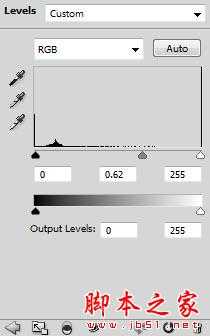
7、色阶,应用下面的图层蒙版。

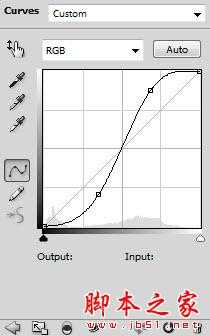
8、曲线。
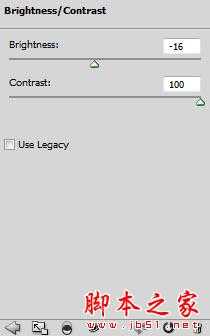
9、亮度/对比度。

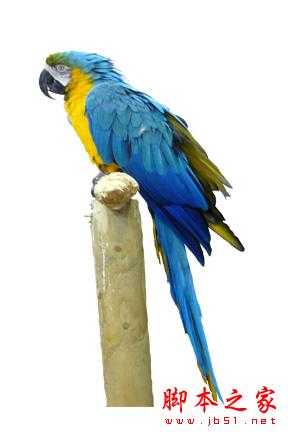
10、打开鹦鹉1图像,将鹦鹉粘贴到我们的文件中,调整位置如下图。

11、用软橡皮(柔角橡皮擦)擦擦掉鹦鹉的一部分如下图。
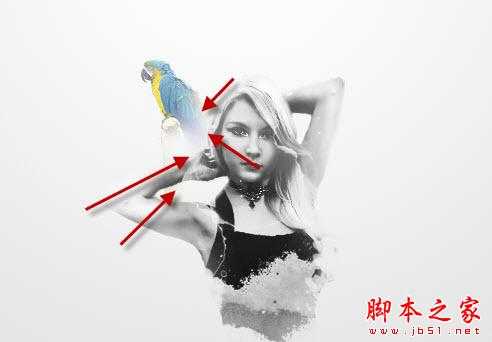
12、添加两个调整图层并已鹦鹉图层为底层执行剪贴蒙版命令。黑白,曲线。
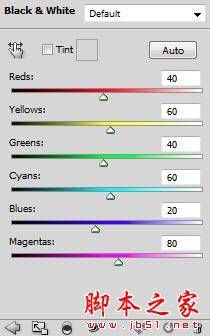
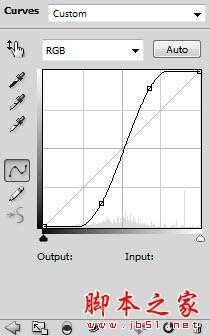

13、我们将添加第二个鹦鹉。把鹦鹉2图片拖到Photoshop并且将该鹦鹉粘贴到我们的文件中,调整位置,如果。
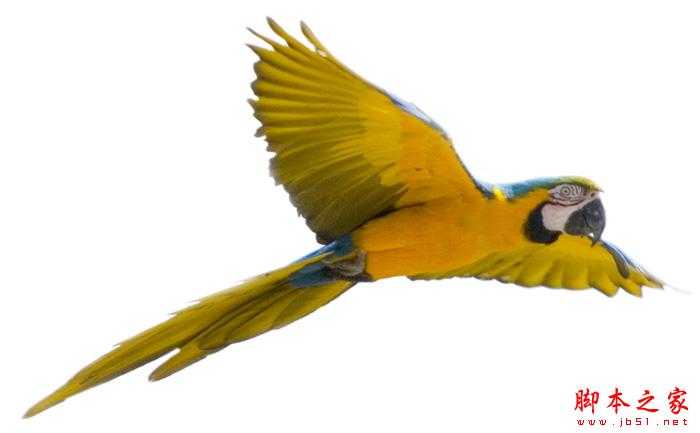
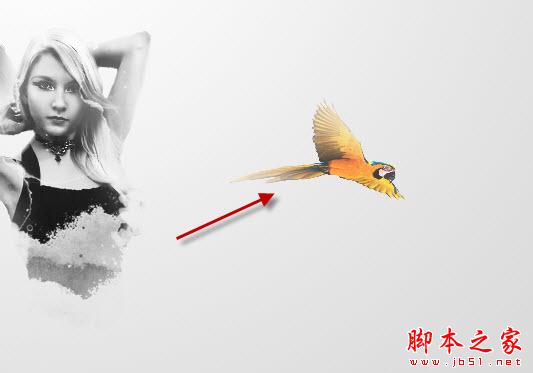
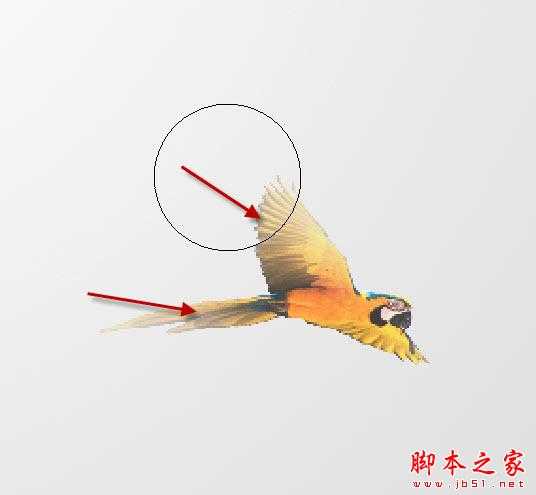
14、用软橡皮擦(用40%的流量和不透明度)擦掉鹦鹉图示的部分并增加一些光效。
上一页12 下一页 阅读全文
最终效果

1、新建一个尺寸是1200*720px白色背景的文件,用渐变工具(G)填充背景。

2、把模特图片拉进Photoshop里面,裁剪模特的上半身粘贴到我们新建的文件里,用橡皮擦工具(调整85%的硬度,为了是边缘不至于太僵硬甚至出现锯齿)擦掉模特下半身,如图。


3、用70%硬度的橡皮擦调整边缘(目的是人物边缘变得柔和)。

4、应用一些轻微减淡和加深效果用颜色减淡和加深工具(设置曝光度为10%)在模特上。

5、用裂痕笔刷作橡皮擦,擦掉模特某些部分,如图。在你用橡皮擦之前,调整为较小尺寸的笔刷。

6、添加下面的图像调整层并已模特为底层执行剪贴蒙版命令:黑白。

7、色阶,应用下面的图层蒙版。


8、曲线。

9、亮度/对比度。


10、打开鹦鹉1图像,将鹦鹉粘贴到我们的文件中,调整位置如下图。


11、用软橡皮(柔角橡皮擦)擦擦掉鹦鹉的一部分如下图。

12、添加两个调整图层并已鹦鹉图层为底层执行剪贴蒙版命令。黑白,曲线。


13、我们将添加第二个鹦鹉。把鹦鹉2图片拖到Photoshop并且将该鹦鹉粘贴到我们的文件中,调整位置,如果。


14、用软橡皮擦(用40%的流量和不透明度)擦掉鹦鹉图示的部分并增加一些光效。

上一页12 下一页 阅读全文
标签:
抽象,人物,插画
蝙蝠岛资源网 Design By www.hbtsch.com
广告合作:本站广告合作请联系QQ:858582 申请时备注:广告合作(否则不回)
免责声明:本站文章均来自网站采集或用户投稿,网站不提供任何软件下载或自行开发的软件! 如有用户或公司发现本站内容信息存在侵权行为,请邮件告知! 858582#qq.com
免责声明:本站文章均来自网站采集或用户投稿,网站不提供任何软件下载或自行开发的软件! 如有用户或公司发现本站内容信息存在侵权行为,请邮件告知! 858582#qq.com
蝙蝠岛资源网 Design By www.hbtsch.com
暂无Photoshop制作简洁抽象的人物插画的评论...
P70系列延期,华为新旗舰将在下月发布
3月20日消息,近期博主@数码闲聊站 透露,原定三月份发布的华为新旗舰P70系列延期发布,预计4月份上市。
而博主@定焦数码 爆料,华为的P70系列在定位上已经超过了Mate60,成为了重要的旗舰系列之一。它肩负着重返影像领域顶尖的使命。那么这次P70会带来哪些令人惊艳的创新呢?
根据目前爆料的消息来看,华为P70系列将推出三个版本,其中P70和P70 Pro采用了三角形的摄像头模组设计,而P70 Art则采用了与上一代P60 Art相似的不规则形状设计。这样的外观是否好看见仁见智,但辨识度绝对拉满。
更新日志
2026年01月29日
2026年01月29日
- 小骆驼-《草原狼2(蓝光CD)》[原抓WAV+CUE]
- 群星《欢迎来到我身边 电影原声专辑》[320K/MP3][105.02MB]
- 群星《欢迎来到我身边 电影原声专辑》[FLAC/分轨][480.9MB]
- 雷婷《梦里蓝天HQⅡ》 2023头版限量编号低速原抓[WAV+CUE][463M]
- 群星《2024好听新歌42》AI调整音效【WAV分轨】
- 王思雨-《思念陪着鸿雁飞》WAV
- 王思雨《喜马拉雅HQ》头版限量编号[WAV+CUE]
- 李健《无时无刻》[WAV+CUE][590M]
- 陈奕迅《酝酿》[WAV分轨][502M]
- 卓依婷《化蝶》2CD[WAV+CUE][1.1G]
- 群星《吉他王(黑胶CD)》[WAV+CUE]
- 齐秦《穿乐(穿越)》[WAV+CUE]
- 发烧珍品《数位CD音响测试-动向效果(九)》【WAV+CUE】
- 邝美云《邝美云精装歌集》[DSF][1.6G]
- 吕方《爱一回伤一回》[WAV+CUE][454M]
