蝙蝠岛资源网 Design By www.hbtsch.com
也许世界上任何一种汽车,都无法与法拉利跑车相提并论,因为法拉利跑车已经超越了交通工具的范畴,成了艺术品,它是很多爱车族眼中的“梦中情人”。下面我们用PS来打造一款“鼠标法拉利”,也很有趣哦!
先看一下效果:
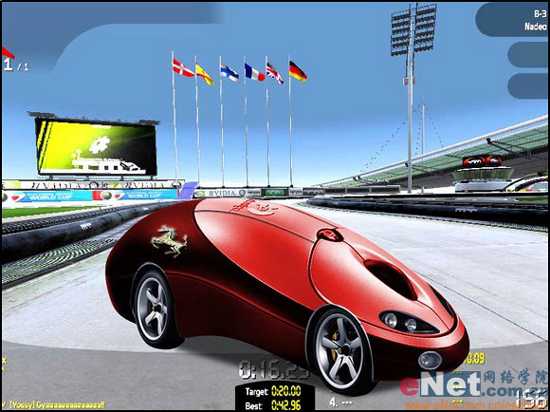
制作工具:Photoshop CS
制作过程:
1、打开一幅鼠标图片和一幅跑车图片,如图01和02所示。
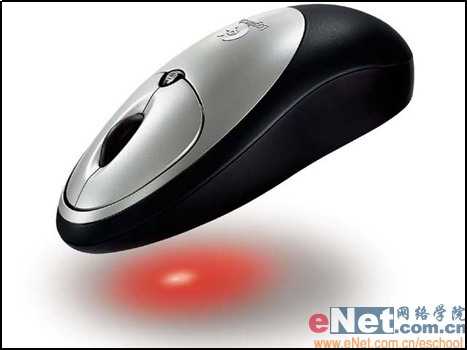
图01

图02
2、选择工具栏中的“磁性套索工具”,沿鼠标边缘建立选区,如图03所示。
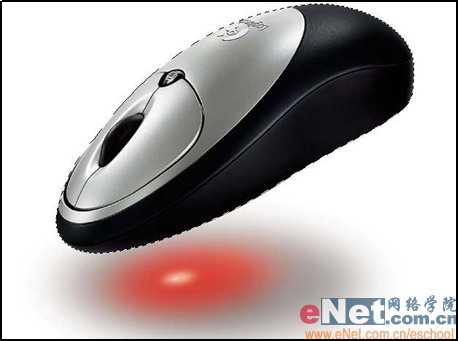
图03
3、按“Shift+Ctrl+I”键反选选区,然后双击背景图层,弹出新图层对话框,保持新图层对话框中的参数不变,单击好按钮后,将背景层转换为一般图层。按“Delete”键将背景删除,取消选区。按“Ctrl+T”键为鼠标添加自由变形框,按图04所示进行调整。
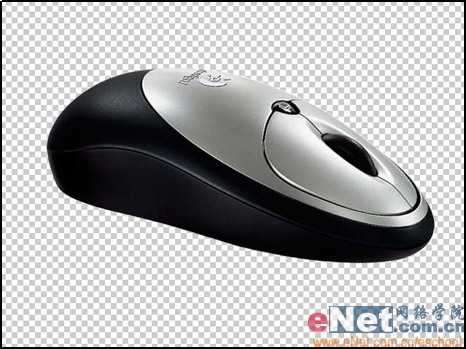
图04
4、选择工具栏中的“钢笔工具”,沿汽车的轮胎绘制路径。在绘制路径的过程中,可按住“Ctrl”键部放使用鼠标拖动锚点,调整锚点的位置,如图05所示。
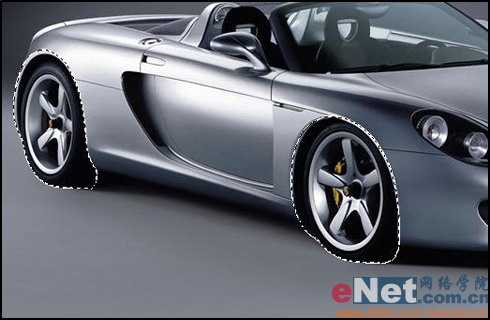
图05
5、按“Ctrl+Eneter”,把工作路径转换为选区,然后将选区内的图像复制到鼠标文件中,得到图层1,效果如图06所示。
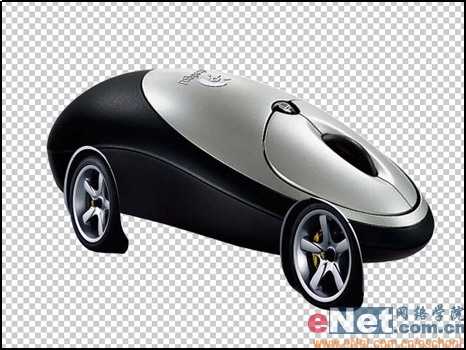
图06
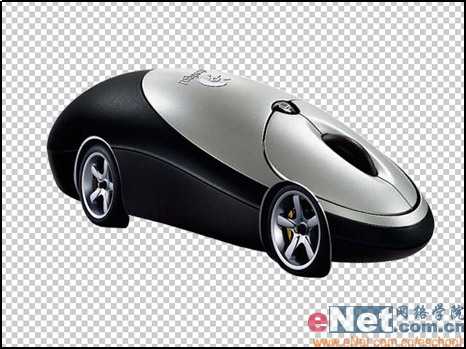
6、按“Ctrl+T”键为鼠标添加自由变形框,适当调整轮胎的大小和位置,完成效果如图07所示。
7、新建一个图层“图层2”,将图层2放置到最底层,选择工具栏中的“多边形套索工具”参照图08所示建立选区,再使用黑色填充选区,使车轮看起来更完整,如图09所示。
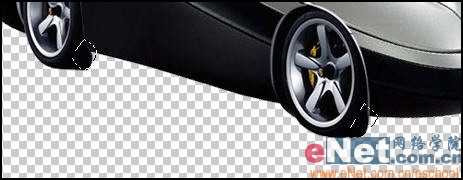
图08
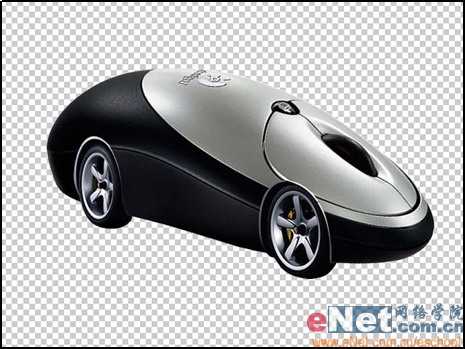
图09
8、选择鼠标所在的层“图层0”,选择工具栏中的“钢笔工具”,在鼠标底部如图10所示的位置绘制如图所示的路径,按“Ctrl+Eneter”,把工作路径转换为选区。然后按“Delete”键删除选区内的图像,取消选区后的效果如图11所示。
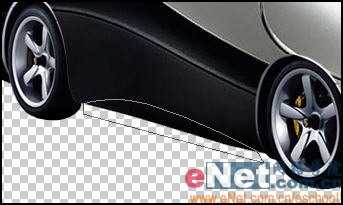
图10
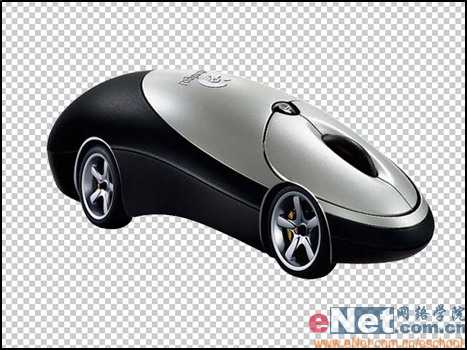
图11
9、选择工具箱中的“钢笔工具”,在汽车文件中沿车头下方的白色小灯绘制路径,按“Ctrl+Eneter”,把工作路径转换为选区,如图12所示。将选区内的图像复制到鼠标文件中,得到图层3,并适当调整车灯图像的位置和大小,如图13所示。

图12
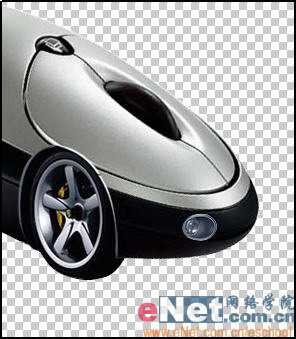
图13
10、用同样的方法将汽车的前大灯复制到鼠标文件中,得到图层4,再适当调整图层4中图像的大小和位置,效果如图14所示。
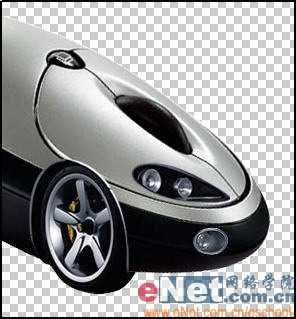
图14
11、将图层4复制生成“图层4副本,选择菜单栏中的“编辑”“变换”“垂直翻转”命令,将图像垂直翻转后,调整其形状和大小,放置在如图15所示的位置。
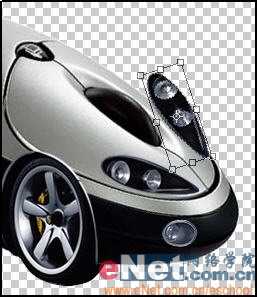
图15
12、选中图层0,选择菜单栏中的“图像”“调整”“色相/饱和度”命令,勾选着色复选框后,设置参数如图16所示,也可以根据自己的喜好设置颜色,效果如图17所示。
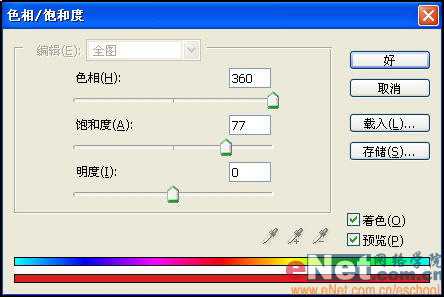
图16
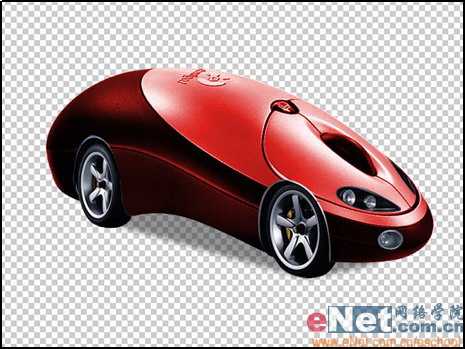
图17
13、在图层面板中新建一个图层“图层5”,然后选择工具栏中的“钢笔工具”,绘制如图18所示的路径。设置前景色为黑色并选择工具栏中的“画笔工具”,在工具选项栏中选择名称为尖角2像素的画笔,在按下“Eneter”键对路径做描边处理。双击图层5,在弹出的图层样式对话框中选择“斜面和浮雕”,按图19设置参数,效果如图20所示。再把它复制到另一侧,把多余的删除掉,调整一下颜色,如图21所示。
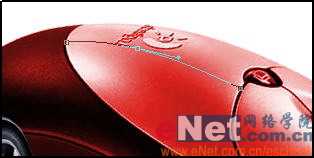
图18
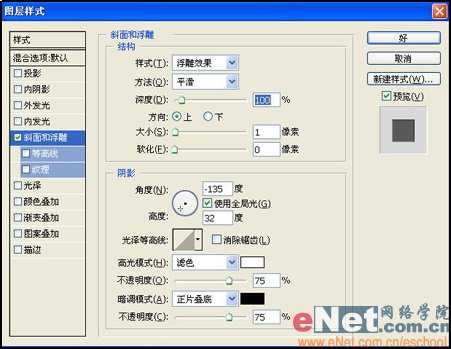
图19
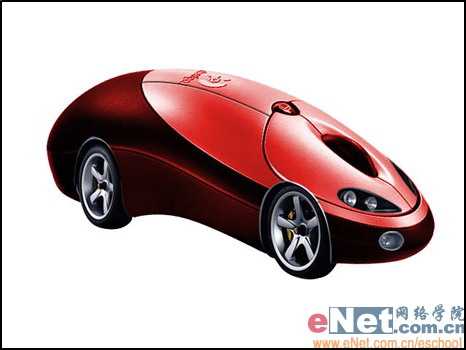
图20
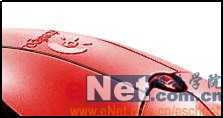
图21
14、在鼠标的尾部放上一个“法拉利”跑车的标志,如图22所示。
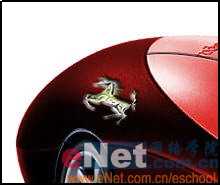
图22
15、新建图层“图层6”放置到图层的最下方,选择工具箱中的“多边形套索工具”绘制如图23所示的选区,并填充黑色。选择菜单栏中的“滤镜”“模糊”“高斯模糊”,在弹出的高斯模糊对话框中设置模糊半径为3.9,效果如图24所示。
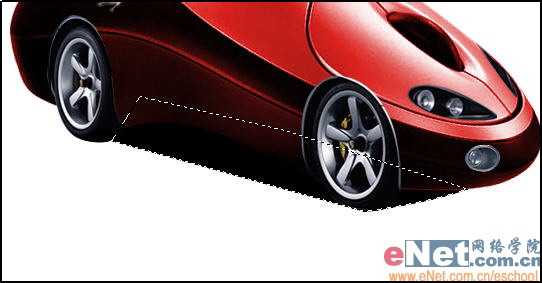
图23
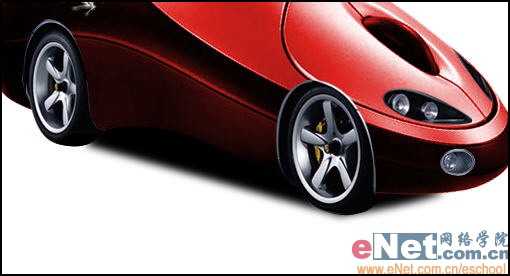
图24
16、在图层控制面板中调整图层6的不透明度为70%。鼠标法拉利跑车效果如图25所示。
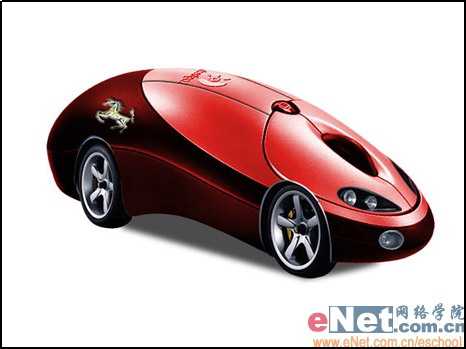
图25
17、为跑车加一幅合适的背景图片,最终效果如图26所示。

图26
先看一下效果:

制作工具:Photoshop CS
制作过程:
1、打开一幅鼠标图片和一幅跑车图片,如图01和02所示。

图01

图02
2、选择工具栏中的“磁性套索工具”,沿鼠标边缘建立选区,如图03所示。

图03
3、按“Shift+Ctrl+I”键反选选区,然后双击背景图层,弹出新图层对话框,保持新图层对话框中的参数不变,单击好按钮后,将背景层转换为一般图层。按“Delete”键将背景删除,取消选区。按“Ctrl+T”键为鼠标添加自由变形框,按图04所示进行调整。

图04
4、选择工具栏中的“钢笔工具”,沿汽车的轮胎绘制路径。在绘制路径的过程中,可按住“Ctrl”键部放使用鼠标拖动锚点,调整锚点的位置,如图05所示。

图05
5、按“Ctrl+Eneter”,把工作路径转换为选区,然后将选区内的图像复制到鼠标文件中,得到图层1,效果如图06所示。

图06
6、按“Ctrl+T”键为鼠标添加自由变形框,适当调整轮胎的大小和位置,完成效果如图07所示。

7、新建一个图层“图层2”,将图层2放置到最底层,选择工具栏中的“多边形套索工具”参照图08所示建立选区,再使用黑色填充选区,使车轮看起来更完整,如图09所示。

图08

图09
8、选择鼠标所在的层“图层0”,选择工具栏中的“钢笔工具”,在鼠标底部如图10所示的位置绘制如图所示的路径,按“Ctrl+Eneter”,把工作路径转换为选区。然后按“Delete”键删除选区内的图像,取消选区后的效果如图11所示。

图10

图11
9、选择工具箱中的“钢笔工具”,在汽车文件中沿车头下方的白色小灯绘制路径,按“Ctrl+Eneter”,把工作路径转换为选区,如图12所示。将选区内的图像复制到鼠标文件中,得到图层3,并适当调整车灯图像的位置和大小,如图13所示。

图12

图13
10、用同样的方法将汽车的前大灯复制到鼠标文件中,得到图层4,再适当调整图层4中图像的大小和位置,效果如图14所示。

图14
11、将图层4复制生成“图层4副本,选择菜单栏中的“编辑”“变换”“垂直翻转”命令,将图像垂直翻转后,调整其形状和大小,放置在如图15所示的位置。

图15
12、选中图层0,选择菜单栏中的“图像”“调整”“色相/饱和度”命令,勾选着色复选框后,设置参数如图16所示,也可以根据自己的喜好设置颜色,效果如图17所示。

图16

图17
13、在图层面板中新建一个图层“图层5”,然后选择工具栏中的“钢笔工具”,绘制如图18所示的路径。设置前景色为黑色并选择工具栏中的“画笔工具”,在工具选项栏中选择名称为尖角2像素的画笔,在按下“Eneter”键对路径做描边处理。双击图层5,在弹出的图层样式对话框中选择“斜面和浮雕”,按图19设置参数,效果如图20所示。再把它复制到另一侧,把多余的删除掉,调整一下颜色,如图21所示。

图18

图19

图20

图21
14、在鼠标的尾部放上一个“法拉利”跑车的标志,如图22所示。

图22
15、新建图层“图层6”放置到图层的最下方,选择工具箱中的“多边形套索工具”绘制如图23所示的选区,并填充黑色。选择菜单栏中的“滤镜”“模糊”“高斯模糊”,在弹出的高斯模糊对话框中设置模糊半径为3.9,效果如图24所示。

图23

图24
16、在图层控制面板中调整图层6的不透明度为70%。鼠标法拉利跑车效果如图25所示。

图25
17、为跑车加一幅合适的背景图片,最终效果如图26所示。

图26
标签:
鼠标,法拉利
蝙蝠岛资源网 Design By www.hbtsch.com
广告合作:本站广告合作请联系QQ:858582 申请时备注:广告合作(否则不回)
免责声明:本站文章均来自网站采集或用户投稿,网站不提供任何软件下载或自行开发的软件! 如有用户或公司发现本站内容信息存在侵权行为,请邮件告知! 858582#qq.com
免责声明:本站文章均来自网站采集或用户投稿,网站不提供任何软件下载或自行开发的软件! 如有用户或公司发现本站内容信息存在侵权行为,请邮件告知! 858582#qq.com
蝙蝠岛资源网 Design By www.hbtsch.com
暂无Photoshop教你使用鼠标制作法拉利教程的评论...
更新日志
2026年01月30日
2026年01月30日
- 小骆驼-《草原狼2(蓝光CD)》[原抓WAV+CUE]
- 群星《欢迎来到我身边 电影原声专辑》[320K/MP3][105.02MB]
- 群星《欢迎来到我身边 电影原声专辑》[FLAC/分轨][480.9MB]
- 雷婷《梦里蓝天HQⅡ》 2023头版限量编号低速原抓[WAV+CUE][463M]
- 群星《2024好听新歌42》AI调整音效【WAV分轨】
- 王思雨-《思念陪着鸿雁飞》WAV
- 王思雨《喜马拉雅HQ》头版限量编号[WAV+CUE]
- 李健《无时无刻》[WAV+CUE][590M]
- 陈奕迅《酝酿》[WAV分轨][502M]
- 卓依婷《化蝶》2CD[WAV+CUE][1.1G]
- 群星《吉他王(黑胶CD)》[WAV+CUE]
- 齐秦《穿乐(穿越)》[WAV+CUE]
- 发烧珍品《数位CD音响测试-动向效果(九)》【WAV+CUE】
- 邝美云《邝美云精装歌集》[DSF][1.6G]
- 吕方《爱一回伤一回》[WAV+CUE][454M]
